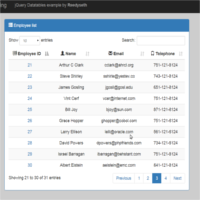
This post is the next part of Working with the jQuery Datatables plugin. Since this tutorial is written for those familiar with the plugin You might need to learn the basics of the plugin on the following link http://behstant.com/blog/jquery/datatables-jquery-implementation/. On this tutorial I am going to focus on how to manipulate the elements of the Datatables by using the sDom property. In the first place you need to know that the plugin jQuery Datatables have 4 visual core elements:
- Number of items to Display.
- The main table.
- Number of records retrieved.
- Paginator.
Since these elements are visual you can put them in different positions or perhaps you can decide to set them visible or not, however, remember that not adding information into this property will result in a working DataTable using the default settings.
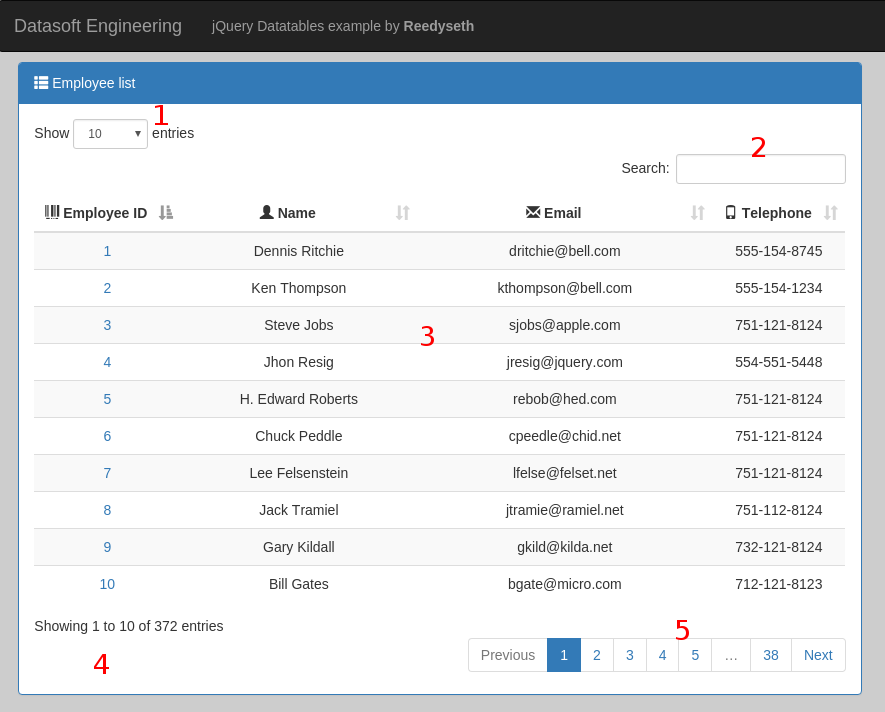
jQuery Datatables sDom meaning
| Shortcut | Image (below) Reference | Quick Reference | Comments |
|---|---|---|---|
| l | 1 | Lenght Changing | This controls the number of records to display in the table. |
| f | 2 | Filtering input | The search box where you can filter or search data in the table. |
| t | 3 | The Table | This is the table where all the information is display. |
| i | 4 | Information | This display the number of records inside the jQuery Datatables. |
| p | 5 | Pagination | Display a pagination section if there many records. |
| r | – | pRocessing | The “Processing” text that pops up when the data is being loaded. This is display when there are many records to be loaded. |
| The Following constants were allowed | |||
| H | – | jQueryUI theme “header” classes (‘fg-toolbar ui-widget-header ui-corner-tl ui-corner-tr ui-helper-clearfix’) | This constants were allow in former versions, now they are deprecaded. You can take a look at the source code where the H constant is replace, it is replace by a value defined here and assigned here. |
| F | – | jQueryUI theme “footer” classes (‘fg-toolbar ui-widget-header ui-corner-bl ui-corner-br ui-helper-clearfix’) | |
| The Following syntax is expected: | |||
| ‘<‘ and ‘>’ – div elements | I will explain this below. | ||
| ‘<“class” and ‘>’ – div with a class | |||
| ‘<“#id” and ‘>’ – div with an ID | |||
Database Setup
Before we can make something with the jQuery Datatable plugin we need information to load so in order to do that please create a table with the name employee in your tutorials database ( if you don’t have this database don’t worry, you can get it by downloading the code ).

After you create the table is time to fill it. You can take three roads from here:
1)You can add information using phpMyAdmin for every record.
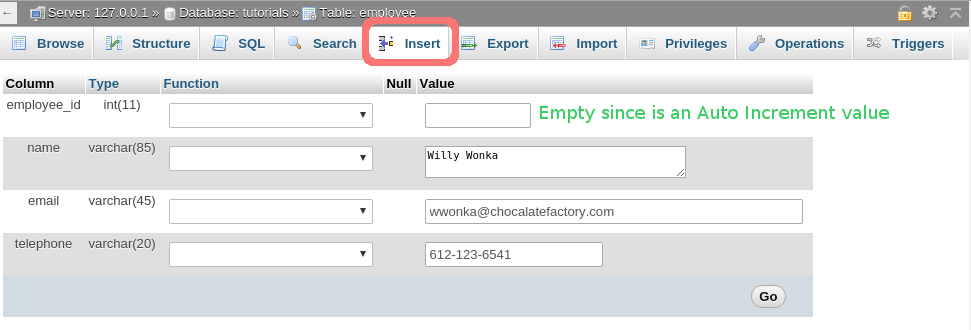
2) You can insert a record manually with random information.
| 1 2 3 | -- INSERT INTO employee(name,email,telephone) VALUES('Pancho Villa','pvilla@revolution.com','123-654-7789'); -- |
3) Use the insert script located in the download files with hundred of records.
After you load the information on the database it is time to start working on the code 🙂
Table Structure
This is the structure of the table where the results will be loaded:
| 1 2 3 4 5 6 7 8 9 10 11 | <table id="resultTable" class="resultTable"> <thead> <tr> <th>Employee ID</th> <th>Name</th> <th>Email</th> <th>Telephone</th> </tr> </thead> <tbody></tbody> </table> |
Let me explain a bit about what is going to happen. We are going to make an Ajax request using jQuery in order to get all the records on the employee table that we previously populated, the backend code is not relevant on this tutorial since I am focusing on the jQuery code, nevertheless you can get the PHP backend code in the download files or the video.
Managing the data
We are going to place the retrieved data into the tbody tag of the table using jQuery like the following example:
| 1 2 3 4 5 | // $('#resultTable tbody').html( tbody ); // |
With the data loaded in the HTML table we are ready to use the jQuery Datatables Plugin like this:
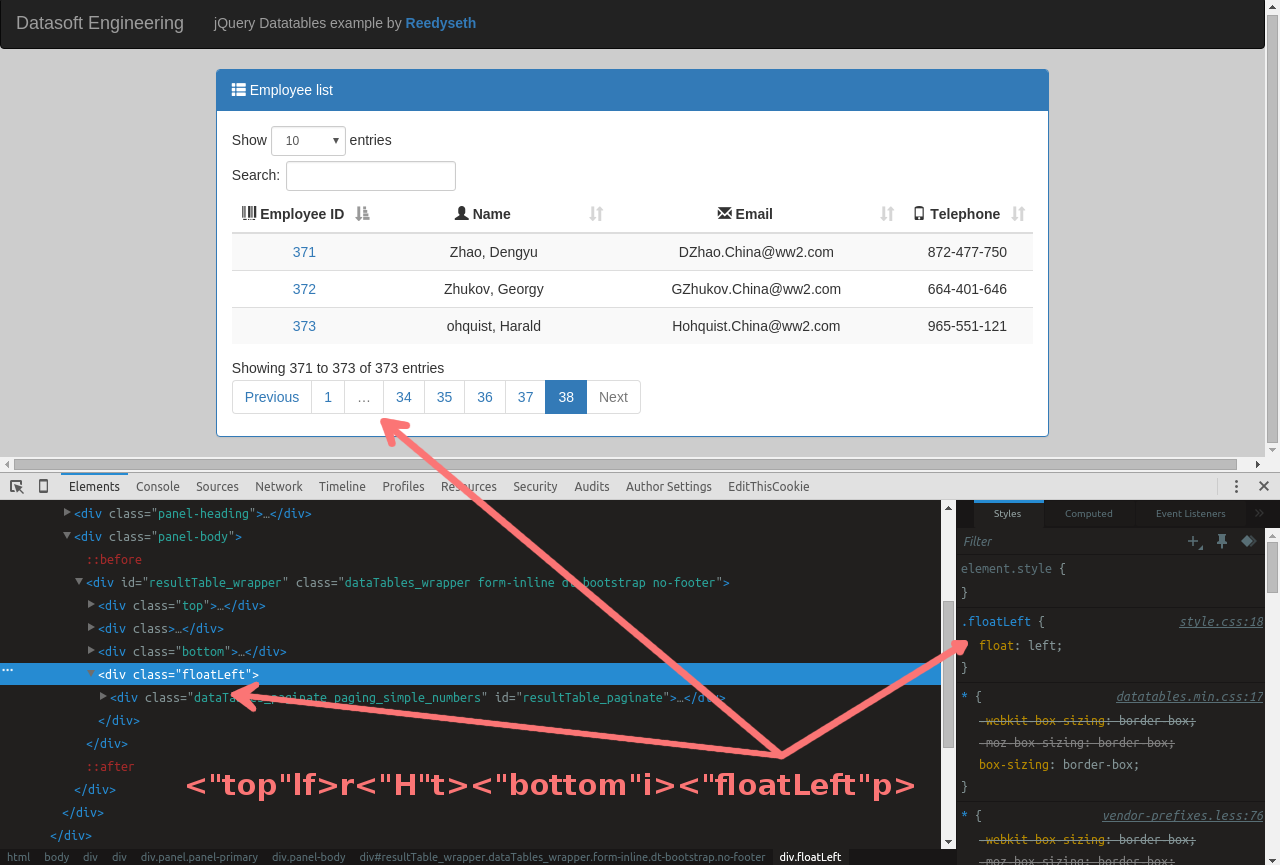
| 1 2 3 | // $('#resultTable').DataTable({ sDom: '<"top"lf>r<"H"t><"bottom"i><"floatRight"p>'}); // |
On the tutorial jQuey Datatable Implementation I showed you how to load this libraries. Now is time to load the retrieve information withe Our core code:
| 1 2 3 4 5 6 7 8 9 10 11 12 13 14 15 16 17 18 19 20 21 | $(document).ready(function() { $.ajax({ url: "php/retrieveEmployees.php", dataType: "json", success: function( response ){ var tbody = ""; for (var i = 0; i < response.length - 1; i++) { tbody += "<tr>" + "<td><a href='#'>"+ response[i].employee_id +"</a></td>"+ "<td>"+ response[i].name +"</td>"+ "<td>"+ response[i].email +"</td>"+ "<td>"+ response[i].telephone +"</td>"+ "</tr>"; } $('#resultTable tbody').html( tbody ); }, error: function(jqXHR, textStatus, errorThrown){ // Just for debuggin purposes } }); }); |
In the previous code I have created the table row elements for each record retrieve. The response by the server is a JSON where we can access the employee fields by their name (the reason of this is that on the backend I kept the database column names). This a portion of the JSON retrieved:
JSON CODE EXAMPLE
If you are concern about data validation then you can make sure that the response variable is an Object and also that is has information, I explain in more detail on the video.
Usage of sDom Property
As I show you on the table the meaning of the letters used on the sDom attribute we are creating / instantiating the jQuery Datatables by placing the length of records on the top by using the “top” class along with the filtering input, this will be our result:
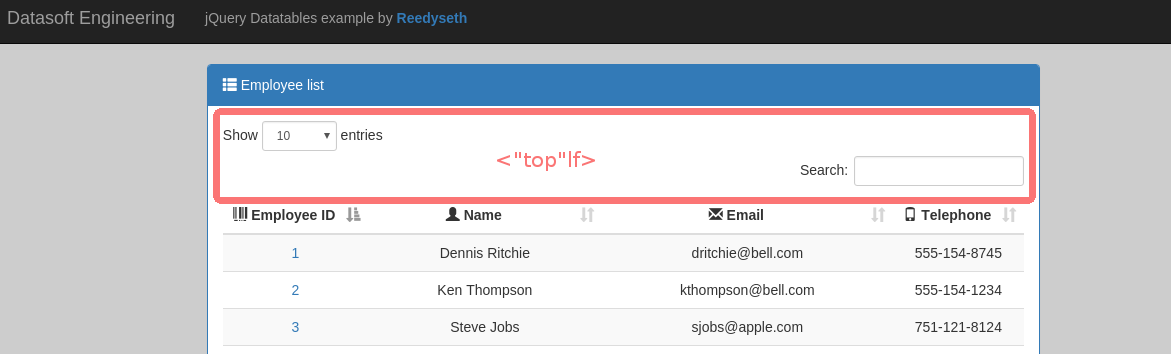
So far we get the default template because we did not defined the attributes for the “top” class, so the result would had been the same as write:
| 1 2 3 | // $('#resultTable').DataTable({ sDom: 'lfr<"H"t><"bottom"i><"floatRight"p>'}); // |
Notice that we remove the “less than” and “greater than” chars, this is because the only purpose to use them is to add a class inside of if. You might ask, how does this work? Well, by wrapping the tokens inside the “less than” and “greater than” chars we are telling the plugin to wrap all inside a div element, therefore if you inspect the code you will find out this:

By adding the “top” class you will find the div containing the “top” class that I mentioned.

CONCLUSION
In conclusion, As you can see placing the correct elements in the property sDOM will allow you to work with classes and the tokens. The sDOM property will help you to position the jQuery Datatables elements in different positions. This property is very useful in when you don’t want the position of the jQuery Datatables in the default settings. Perhaps you want to apply a custom CSS to the Datatables controls. You can use this to move the Search input into the left and the Paginator ( by default is on the right ) see the example:
The jQuery DataTables sDOM property will allow you to customize the layout to fit your design needs.
Leave a reply if you found this helpful or let me know what do you think about this plugin.
DOWNLOAD THE FULL CODE
I encourage to purchase the code, as a result, you will get this with the purchase:
- Application style displayed on the images.
- Bootstrap HTML code for the examples.
- Server side code to retrieve the information in JSON format.
- Database file to avoid the manual insertions of records.
- Full code commented. PRO
- Responsive code. PRO
- Custom database validation on server (PHP) side and client side to prevent a broken code. PRO
- Help to implement THIS code. PRO